Geo Avatar
Instructions for the Lesson:
Before you begin your Geometric Avatar you will need to view the slide show linked below and answer the five questions that go with it. Please download the Geometric Avatar Worksheet at the bottom of this post.
Avatar Slideshow
http://www.nytimes.com/slideshow/2007/06/15/magazine/20070617_AVATAR_SLIDESHOW_1.html
Next, you will follow the directions to create your Geometric Avatar. Please make sure that your selfie is no bigger that eight by ten inches otherwise you will have problems with the size. To edit the size of your picture, open it in Preview and go to Image, scroll down to Image Size and make yours 8 inches by 10 inches. Make sure the units are in inches and save.
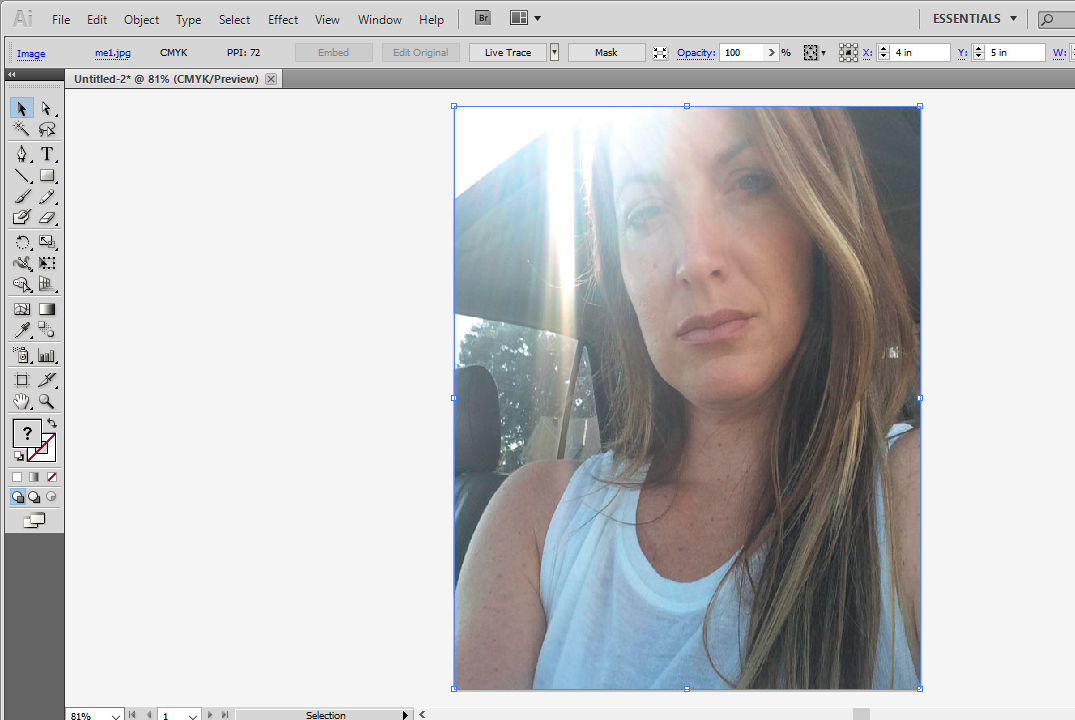
Once you have your Selfie sized you will open up Illustrator and create a New File 8 inches by 10 inches. Next, you will got to File than Place than select your Selfie (File > Place > (choose picture)). Once your selfie is placed with the first layer you find the Layers Pallet if it is not up by clicking on Window > Layer. Next, you will add a new layer by clicking on the piece of paper next to the trash icon on the Layers Pallet.
Making sure you are on the Layer 2. You will begin using the Pen Tool to create your geometric shapes. You will need to set the Pen stroke to 1 and white while the fill is transparent. Try to follow the shapes you see and make sure that you use your pen tool to make sure that each line connects to each other to make a shape
Making sure you are on the Layer 2. You will begin using the Pen Tool to create your geometric shapes. You will need to set the Pen stroke to 1 and white while the fill is transparent. Try to follow the shapes you see and make sure that you use your pen tool to make sure that each line connects to each other to make a shape
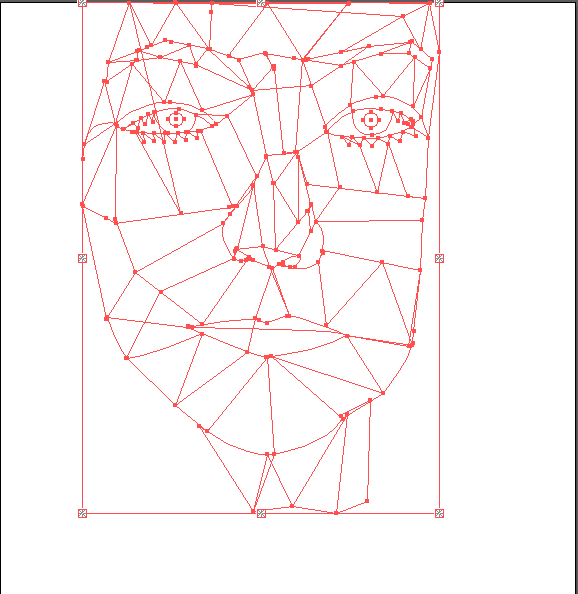
Layer 1 has been hidden to better show the geometric shapes and lines
created. All the lines have been selected with the selection tool
created. All the lines have been selected with the selection tool
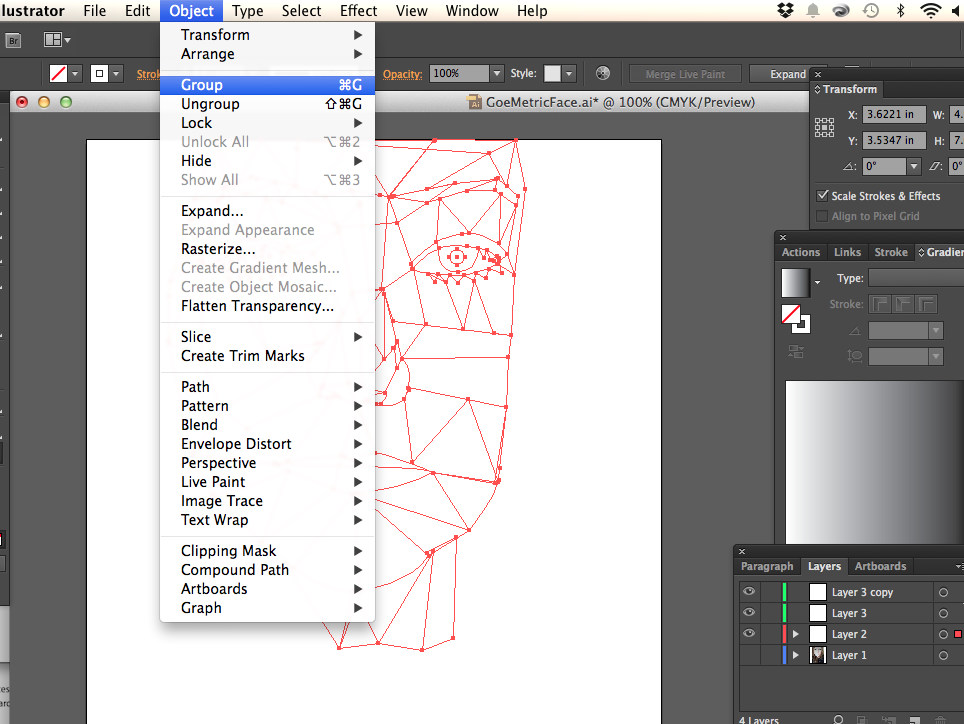
In order for my geometric shapes and lines to become a pattern I needed
to go to Object > Group and than Object> Path.
to go to Object > Group and than Object> Path.
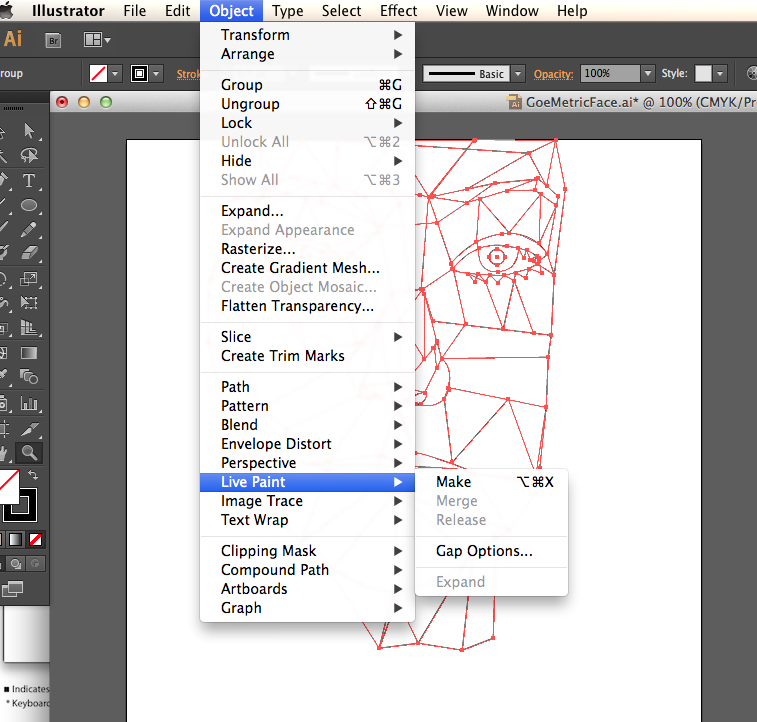
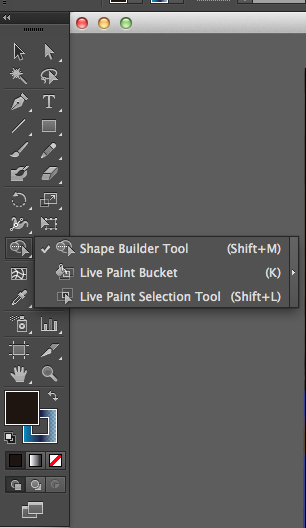
One you have paths and groups you will need to convert it to live paint so you can
paint. Go to Object than Live Paint than Make. You will know if you have been successful
making it Live Paint as your shapes and lines will become a brighter red.
Once you have all the lines made into live paint you will be able to use the live paint bucket tool to choose your colors. By clicking on the original image on Layer 1 you will use the eyedropper tool to find different colors of your face. Once you have selected a color you want you will click on the Layer 2 so it is highlighted in the Layers Pallet and you will paint with the live paint bucket. Try a variety of colors to get the look you want.
Now select the whole picture, click Expand on the top tool bar (so it is no longer a Live Paint Object) and make the stroke color transparent (the white lines should now disappear).
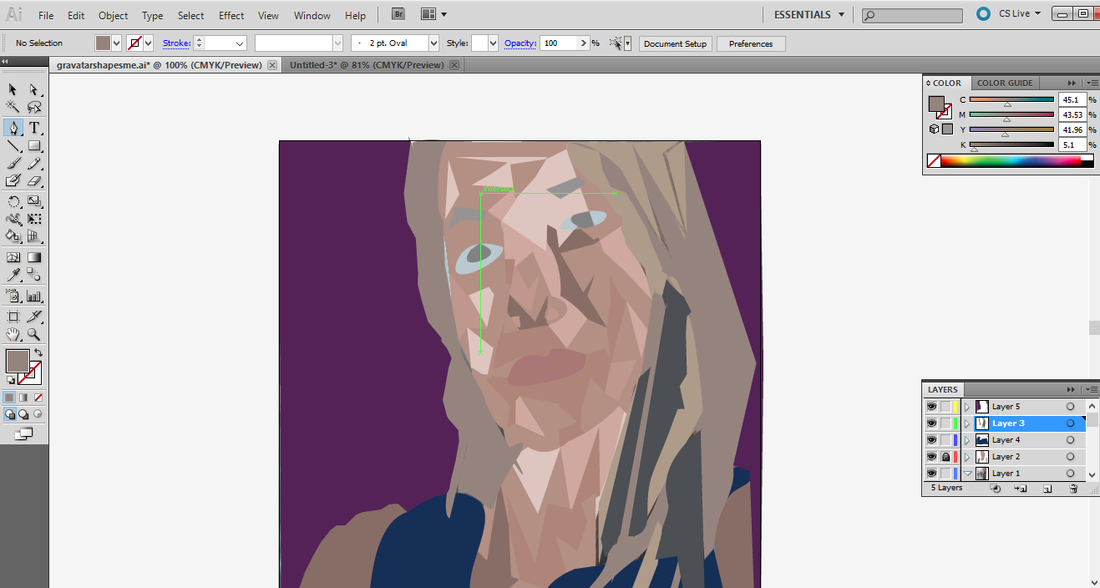
Make sure to add hair, clothing and a background. Please use new layers for each new addition to you design just in case you want to edit.
| geoavatarworksheet.doc |
| geoavatarchecklist.doc |
| geoavatarrubric.pdf |
